Posts tonen met het label this little piggy. Alle posts tonen

zaterdag 8 juni 2019

Flip Flap Kaart / Flip Flap Card


Hey, hey!
Met de stempelset Cuckoo For You kun je niet alleen die ontzettend leuke koekoeksklok maken.
The Stamp Set Cuckoo For You doesn't only make that so incredibly cute cuckoo clock.


Het mechanisme dat erbij hoort is zo veelzijdig. Kijk maar eens naar deze voorbeelden. Ik heb er maar de naam Flip Flap Kaart aan gegeven.
The mechanism that goes with it is so versatile. Just have a look at these examples. I'm calling them Flip Flap Cards.


Het zijn nog prototypes, maar je krijgt wel een idee.
They're still prototypes, but they'll give you some idea.
Ik heb gebruikt
I have used

This Little Piggy
Around The Corner
Cuckoo Clock Dies
Van Alles Wat (Itty Bitty Greetings)
Balloon Bouquet Punch
Gorgeous Grape Stamp Pad
Granny Apple Green Stamp Pad
Balmy Blue Stamp Pad
½" Circle Punch
Sponge Brayers
Purple Posy Card Stock
Pretty Peacock Card Stock
Rococo Rose Card Stock
Thick Whisper Card Stock
Whisper White Card Stock
Petal Pink Dark & Light Blends
Flirty Flamingo Light Blend
Granny Apple Green Light Blend
Journaling Pen 0,5

De basiskaart is Thick Whisper White, gesneden op 10,5 cm en gerild op 14,85 cm.
De mat is 9,8 x 14,2 cm.
The base card is Thick Whisper White, cut at 4"  and scored at 5".
The mat is Whisper White, 3" x 5".
Het varkentje is linksonder gestempeld 2 cm vanuit links en 3 cm vanuit de bodem.
The piggy has been stamped in the bottom left corner, ¾" from the left and 1¼" from the bottom.


vrijdag 29 maart 2019

Belofte Maakt Schuld / A Promise is A Promise


Hey, hey!
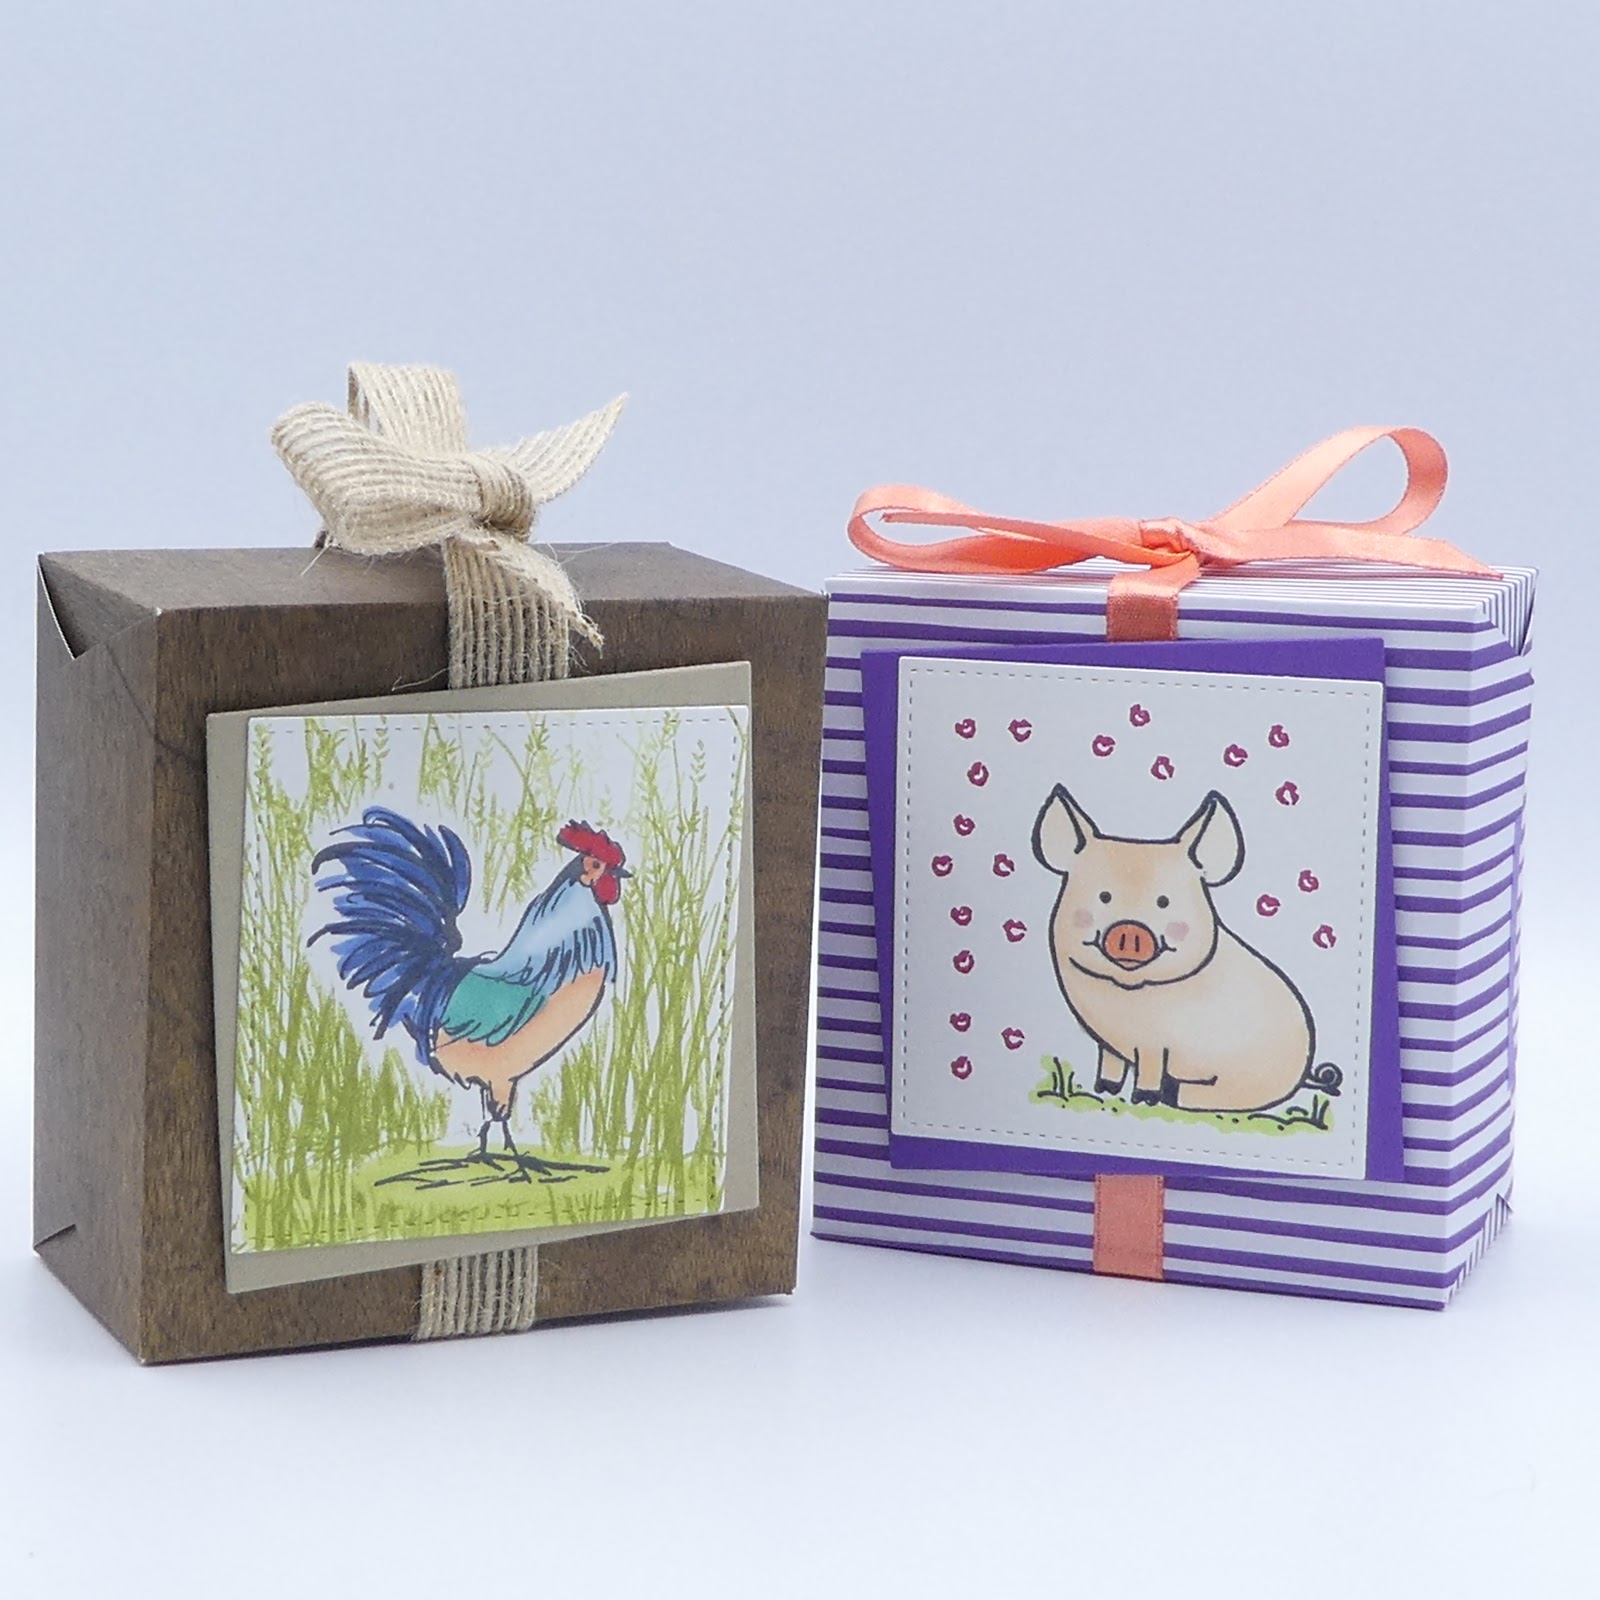
Veertien dagen geleden heb ik je laten zien hoe je zo'n doosje met aparte zijkant maakt. Ik heb je toen beloofd nog te laten zien dat je het ook kunt maken met twee stukken papier van 6" x 6" (15,25 x 15,25 cm) en ook hoe je het lintje er makkelijk op vast kunt maken.
Two weeks ago I posted a video on a gift box with an unusual side closing, I promised you at the time to show you how to make it from two pieces of 6" x 6" paper and how to attach the ribbon.

Vandaag los ik die belofte in.
A promise is a promise.
Zet de eerste twee rillijnen op 3,20 en 12,05 cm.
The first two score lines go at 1¼" and 4¾".
De tweede twee rillijnen op 1,25 en 6,05 cm.
The second set goes at ½" and 2⅜".
Voor het doosje met de haan heb ik het Wood Textures 6" x 6" Designer Series Paper gebruikt en voor het biggetje het 6" x 6" Designer Series Paper uit de Brights serie. De kleur is Gorgeous Grape.
The cockerel box is made with the Wood Textures 6" x 6" Designer Series Paper and the piglet box with the 6" x 6" Designer Series Paper in the Brights series. The colour used is Gorgeous Grape.
De haan is gestempeld met Home to Roost en het biggetje is van This Little Piggy. Ik heb de stempels gekleurd met diverse Stampin' Blends.
The cockerel stamp is from Home to Roost and the piglet from This Little Piggy. I've used various Stampin' Blends to colour them.
Je hebt ongeveer 70 cm lint nodig. Voor het doosje met de haan is het Burlap Ribbon gebruikt, voor het doosje met het biggetje het ⅜" Satin Ribbon in Calypso Coral.
You need about 27" of ribbon. For the cockerel box I've used the Burlap Ribbon, for the piglet box the ⅜" Satin Ribbon in Calypso Coral.


vrijdag 29 juni 2018

Handmade Frame

Hey hey!

This tutorial shows you how I have made these beautiful frames. I started out by using the Glossy White paper. The gloss fools anyone into thinking it is a real frame and the frames look just beautiful.

I give credit to Jodi of HappyHouseCreates who shared her idea to make these frames in almost any size (normally with a shadow box type frame the paper size limits your options rather). I just couldn't get the corners to fit neatly, brooded on this for a day or two and made an improvement on her idea. 

You can see the corner gapes

And here you can see the improved version

Neat Corners
Here are some directions on sizes:

First you decide how large your background will be. In this case the image is on a die cut made with the second largest square Stitched Shape Framelit. This measures 2⅛' x 2". I wanted roughly 1½" background around it, which comes down to a 3½" x 3½" square for my back ground.

The frame itself, when stuck together is 1" wide, so to calculate what paper size to cut, you add 2" to your measurements (one inch for each side). And here comes my improvement: you add another ½" which will make the extra little flap.  
You can make frames like this in many more sizes.

In the video you can see a tutorial, I hope you enjoy it.


Because I had run out of Glossy White, I decided to make some frames in our regular Card Stock I couldn't get enough of making them and I had already made the back grounds and the hand-coloured images from Bella & Friends and Pretty Kitty. And you know what? These are really beautiful too.


I hope you have enjoyed watching my very first video tutorial, no doubt I have things to learn still and I look forward to receiving your comments. 


woensdag 27 juni 2018

This Little Piggy

Hey, hey!

Wie wordt er niet vrolijk van dit varkentje? Ik heb er expres enkel Veel liefs opgezet, dan kan ik dit kaartje gebruiken voor een verjaardag, om iemand beterschap te wensen… vul maar in. Ik ga met dit kereltje nog meer dingen maken.


Doesn't this make you smile? I cased the catalogue in this instance and used the Note Cards and Envelopes. I am so happy This Little Piggy is still in the Annual Catalogue. There's more projects I have in mind for it.