
Hey, hey!
|
|
Soms is het moeilijk een naam te verzinnen voor iets dat
je maakt. Deze keer heb ik dan maar gekozen voor een naam die precies zegt
waar het vandaan kwam. Sinds plastic tasjes in de ban zijn gedaan, krijg je
je frietjes mee in een papieren tasje - met van deze handvatjes.
|
Sometimes it’s hard
to think of a name for a project. So this time I have called it by the name
of what inspired this bag. Since plastic bags have been banned, take-away
food is taken home in paper bags, and the one I got the other day had handles
like these.
|
Ik zat zo eens te kijken en heb ze toen genomen om aan
een geschenktasje vast te maken. Deze tasjes zijn voor gasten op één van mijn
workshops. Je kunt ze van te voren maken en plat opbergen, ze nemen dan
weinig ruimte in beslag en je hebt altijd een leuke geschenkverpakking bij de
hand.
|
I sat there looking
at the handles and decided to reproduce them for use on a gift bag. These
bags are for guests at one of my workshops. You can even make them in advance
and store them flat, they take up little space like that and you always have
some nice gift packaging handy.
|

Het formaat van het tasje (handvatten niet meegerekend)
is L 8,4 x B 5,1 x H 11,8 cm, dus je kunt er iets kleins in kwijt.
|
The size of the bag
(the handles not included) is L 3¼" x W 2" x H 4⅝, so a nice size
for a small present.
|

Wat
heb je nodig?
-
Designer Series Paper 27,95 x 21,90 cm voor
tasje (het groene papier zit niet meer in de collectie)
-
2 stroken card stock 1,25 x 15,25 cm voor de handvatten
-
Designer Series Paper 7,95 x 9,85 cm voor de bodeminzet
|
What do you need?
-
Designer
Series Paper 11" x 8⅝" for
the bag (the green paper I've used is no longer current)
-
2 card stock
strips ½" x 6" for the handles
-
Designer
Series Paper 3⅛" x 3⅞" for the bottom liner
|

Het
tasje:
-
met de lange zijde boven, ril helemaal naar
beneden op 1,25 / 6,35 / 14,60 / 19,70 cm
-
met de lange zijde boven, ril tot aan 14,30 cm op 3,80 cm en 17,15 cm
-
met de korte zijde boven, ril op 5,1 en 16,85
cm
-
maak de schuine rillijnen
|
The bag:
-
with the long
side top, score all the way down at ½" / 2½" / 5¾" / 7¾"
-
with the long
side top, score down as far as the
5⅝" mark at 1½" and 6¾"
-
with the short
side top, score at 2" and 6⅝"
-
make the
angled score lines
|

De
handvatten:
-
met de lange zijde boven, potloodtekentje op 5,70
en 9,50 cm
-
keer de strook om en zet een tekentje op 4,45
en 10,80 cm
-
het potloodlijntje om het plakken simpeler te
maken zet je op 3,80 cm
|
The handles:
-
with the long
side top, pencil mark at 2¼" and 3¾"
-
turn the strip
and score at 1¾" and 4¼"
-
The pencil
line to make gluing easier is put at 1½"
|
De
bodeminzet:
vouw over de helft, plak helften op elkaar, doe lijm op
één kant en plak op bodem van tasje.
|
The bottom liner:
fold in half, glue
halves down, put glue on one side and stick to bottom of bag
|
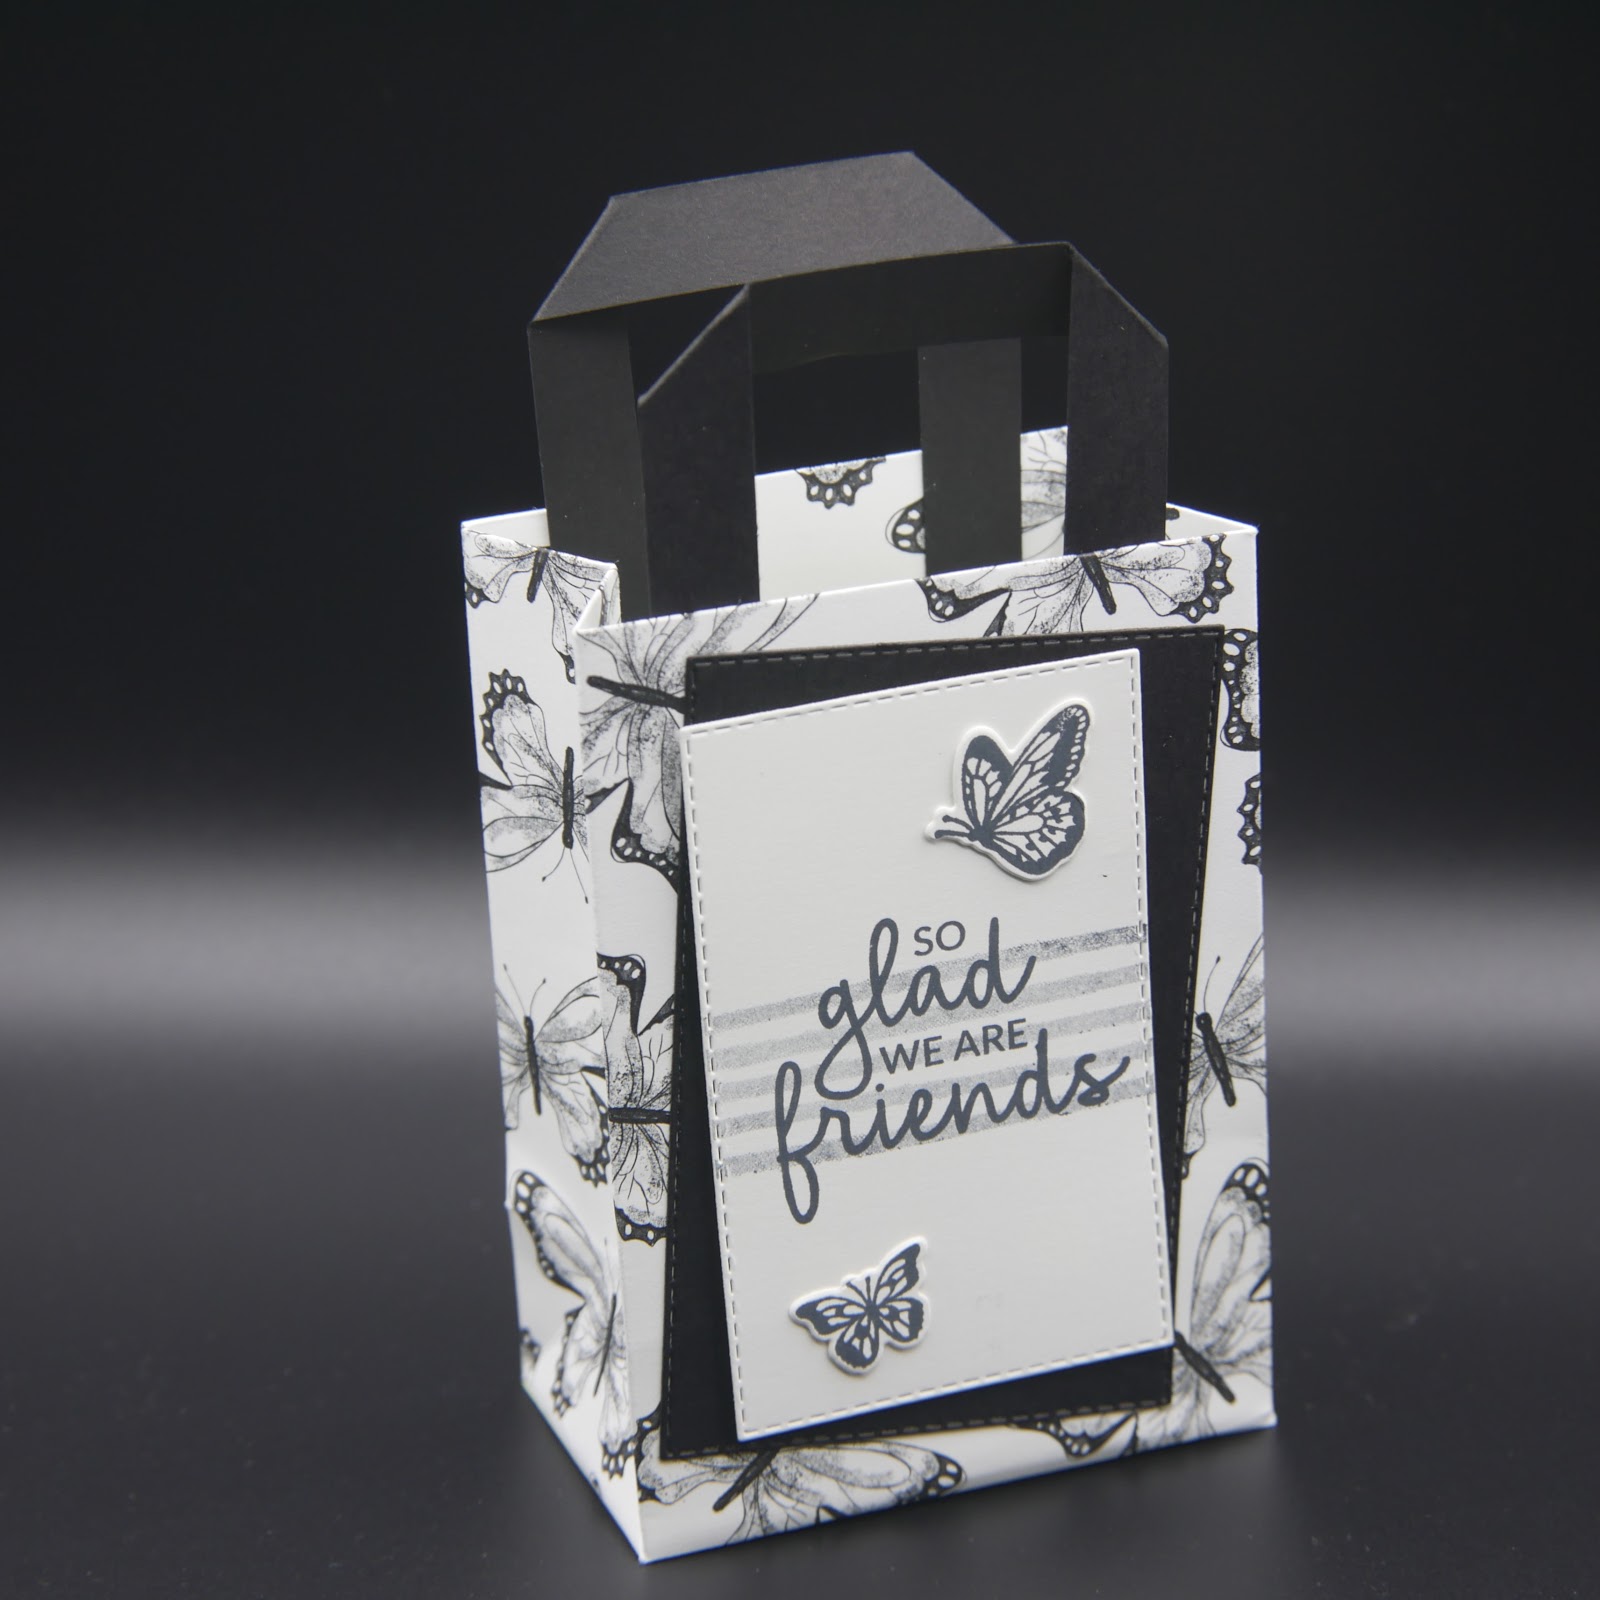
Voor de versiering heb ik van de nieuwe Rectangle
Stitched Framelits de vierde en de vijfde grootste gebruikt, bestempeld met
Incredible Like You.
Voor het zwart-witte tasje is ook nog de stempelset
Beauty Abounds gebruikt en het Sale-a-Bration Designer Series Paper Botanical
Butterfly.
|
For the decoration
I've used the fourth and fifth largest of the new Rectangle Stitched Framelits,
stamped with Incredible Like You.
For the
black-and-white bag I've also used the stamp set Beauty Abounds and the Sale-a-Bration
Designer Series Paper Botanical Butterfly
|


