vrijdag 29 maart 2019

Belofte Maakt Schuld / A Promise is A Promise


Hey, hey!
Veertien dagen geleden heb ik je laten zien hoe je zo'n doosje met aparte zijkant maakt. Ik heb je toen beloofd nog te laten zien dat je het ook kunt maken met twee stukken papier van 6" x 6" (15,25 x 15,25 cm) en ook hoe je het lintje er makkelijk op vast kunt maken.
Two weeks ago I posted a video on a gift box with an unusual side closing, I promised you at the time to show you how to make it from two pieces of 6" x 6" paper and how to attach the ribbon.

Vandaag los ik die belofte in.
A promise is a promise.
Zet de eerste twee rillijnen op 3,20 en 12,05 cm.
The first two score lines go at 1¼" and 4¾".
De tweede twee rillijnen op 1,25 en 6,05 cm.
The second set goes at ½" and 2⅜".
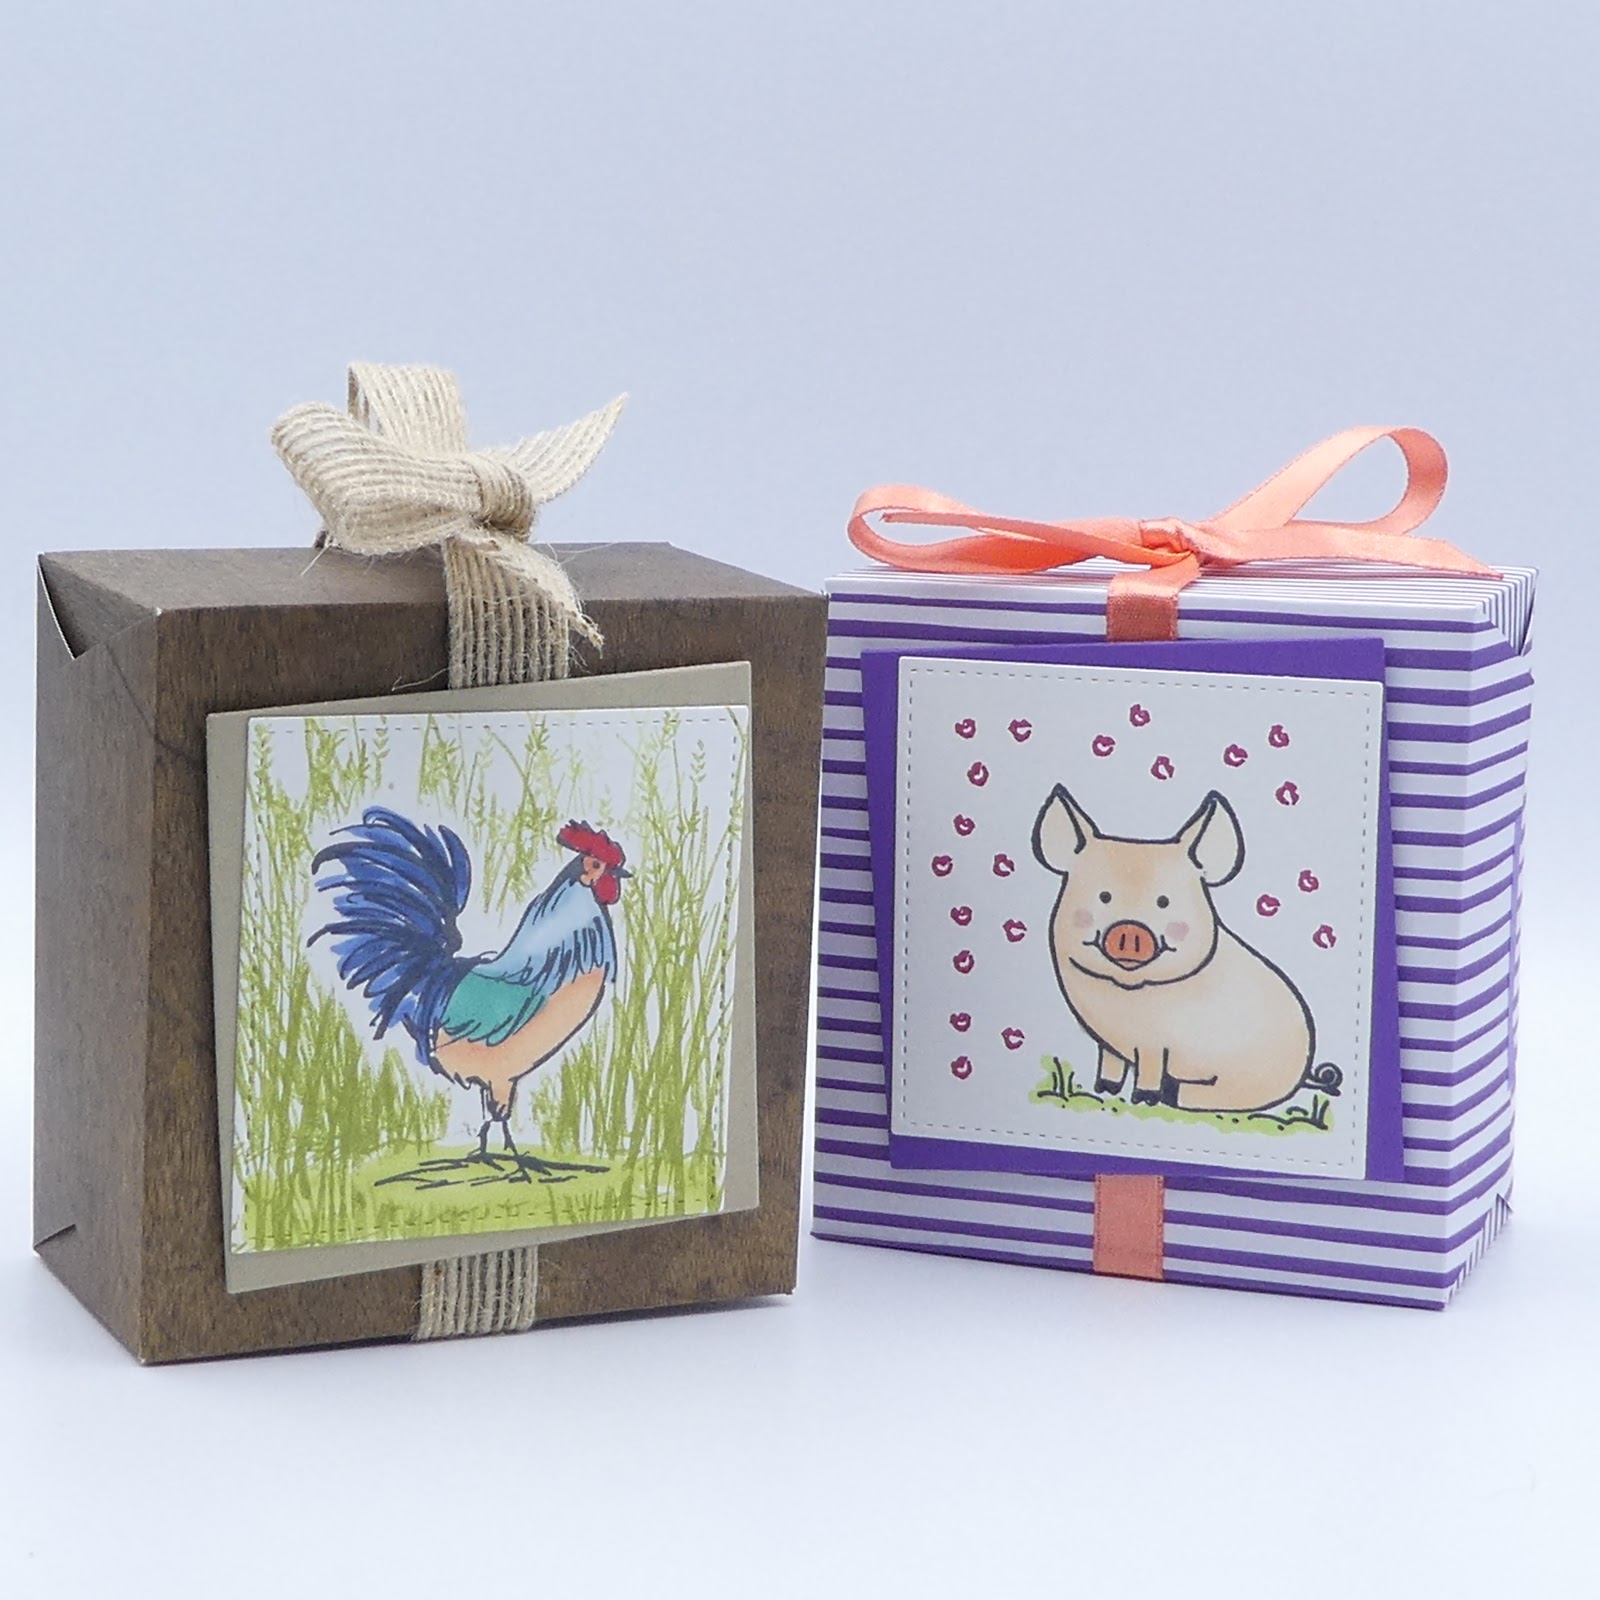
Voor het doosje met de haan heb ik het Wood Textures 6" x 6" Designer Series Paper gebruikt en voor het biggetje het 6" x 6" Designer Series Paper uit de Brights serie. De kleur is Gorgeous Grape.
The cockerel box is made with the Wood Textures 6" x 6" Designer Series Paper and the piglet box with the 6" x 6" Designer Series Paper in the Brights series. The colour used is Gorgeous Grape.
De haan is gestempeld met Home to Roost en het biggetje is van This Little Piggy. Ik heb de stempels gekleurd met diverse Stampin' Blends.
The cockerel stamp is from Home to Roost and the piglet from This Little Piggy. I've used various Stampin' Blends to colour them.
Je hebt ongeveer 70 cm lint nodig. Voor het doosje met de haan is het Burlap Ribbon gebruikt, voor het doosje met het biggetje het ⅜" Satin Ribbon in Calypso Coral.
You need about 27" of ribbon. For the cockerel box I've used the Burlap Ribbon, for the piglet box the ⅜" Satin Ribbon in Calypso Coral.


vrijdag 22 maart 2019

Pop-Outkaart / Pop-Out Card


Hey, hey!
Ik heb dit idee ooit gezien bij Jennifer McGuire. Ik vond toen al dat het met de spulletjes van Stampin' Up! ook gemaakt zou kunnen worden, dus ik ben aan het experimenteren gegaan.
I once saw this idea at Jennifer McGuire. I then immediately thought it would be something for which the Stampin' Up! products could be used too, so I decided to do some experimenting.


Ik noem ze Pop-Outkaart, omdat de afbeelding geen pop-up is, maar er juist uitsteekt.
I'm calling it Pop-Out Card, because the image doesn't so much pop up as stick out.


De stempelsets zijn Animal Outing met de bijpassende Animal Friends Thinlits. De tekst is uit Happy Birthday Gorgeous, in Shaded Spruce Classic Ink.
The stamp sets are Animal Outing with the matching Animal Friends Thinlits. The sentiment is from Happy Birthday Gorgeous, in Shaded Spruce Classic Ink.


Ik heb een half vel A4 in Smoky Slate gebruikt en wat restjes Whisper White om op te stempelen.
I've used half an A4 sheet of cardstock in Smoky Slate and some Whisper White scraps for the stamping.
Maat: 14,85 x 21 cm. Op 10,5 cm een hulplijntje.
Size: 8¼" x 5". At the 4" mark a pencil line.
Stampin' Blends:
neushoorn / rhinoceros:
Smoky Slate Light & Dark / Color Lifter
vogel / bird:
Balmy Blue Light, Mango Melody Light, Pumpkin Pie Dark
gras / grass:
Shaded Spruce Light
In het filmpje kun je zien hoe je kaart maakt.
You can see in the tutorial how to make the card.


vrijdag 15 maart 2019

Opvouwbaar geschenkdoosje met aparte zijkant / Fold-flat Gift Box With Unusual Side Closing


Hey, hey!
Op blz. 9 van de Lente-Zomercatalogus staat een doosje met een aparte zijkant. Ik vind dat zo'n leuke sluiting, dat ik het doosje heb nagemaakt. Ik heb net zo lang gevogeld totdat het me gelukt is.
On page 9 of the Spring Summer Catalog there's a box with an unusual closing. I like it so much, I have tried to make one myself. I have fiddled around with it until I finally got it to my satisfaction.


Als je het eenmaal doorhebt, is het simpel maar voordat ik eruit was… De aanhouder wint zullen we maar zeggen.
Once you've got it, it's simple but before I got there… Perseverance does the job anytime, shall we say.


Je kunt het maken van card stock maar ook van het Designer Series Paper. Je kunt het helemaal van te voren maken en plat opgevouwen bewaren totdat je het nodig hebt. Kijk maar eens in het filmpje onderaan.
You can make it from card stock but also from Designer Series Paper. You can make it completely in advance and store it flat until you need it. Have a look at the tutorial below.
Ik heb het gemaakt met het papier en de Framelits van de Wonderful Romance suite.
I have used the paper and the Framelits in the Wonderful Romance suite.
De maten:
The measurements:
Designer Series Paper 30,50 x 15,25cm.
Designer Series Paper  12" x 6".
met de lange zijde boven, ril op 9,50 / 14,30 / 23,80 / 28,55 cm.
met de korte zijde boven, ril op 3,2 en 12,05 cm
vouw alle rillijnen en loop ze voorzichtig na met het vouwbeen, knip zoals in het filmpje
with the long side top, score at 3¾" / 5" / 9" / 11¼"
with the short side top, score at 1¼ and 4¾"
fold and gently reinforce all score lines, cut as in the tutorial
de maat vanuit de zijkant om de schuine kant te knippen is 1,25 cm
the measurement from the side to cut at an angle is ½"


Ik heb vier blaadjes in Mossy Meadow, een takje in Old Olive en de kleine takjes in Pear Pizzazz gestanst.
Verder vijf bloemetjes gestempeld in Fresh Fig, gekleurd met Petal Pink en gestanst.
I've die cut four leaves in Mossy Meadow, one sprig in Old Olive and the small sprigs in Pear Pizzazz.
Also five small flowers stamped in Fresh Fig, coloured in Petal Pink and die cut.


Je hebt ongeveer 66 cm lint nodig - ik heb lint gebruikt dat niet meer in de collectie zit (Mini Striped Ribbon in Cucumber Crush).
Dit is weer eens een bewijs hoe mooi alles van Stampin' Up! bij elkaar past. Ik heb sinds ik Stampin' Up! demonstrator ben, geen spullen meer waar ik later niets meer mee kan doen omdat de kleuren het net niet zijn. En geloof me, daar had ik veel van!
Je kunt natuurlijk ook het Petal Pink/Whisper White ribbon nemen dat bij de Suite hoort.
You need about 26" of ribbon - I have used some retired ribbon (Mini Striped Ribbon in Cucumber Crush)
This only goes to show how beautifully everything Stampin' Up! co-ordinates. Since joining up as a Stampin' Up! demonstrator I no longer have things I cannot use later any more because the colours are just not right. And believe me, I had tons before.
Of course you could also take the Petal Pink/Whisper White ribbon that goes with the Suite.
Het is een veelzijdig te gebruiken ontwerp, het is makkelijk aan te passen, met ander papier krijg je een andere look.
It's a really versatile design, you can easily adapt it, with different paper you get a different look.


In het filmpje hieronder kun je meer zien.
You can see more in the tutorial below.


vrijdag 8 maart 2019

Tea For One


Hey, hey!
Heerlijk genieten van een kopje thee met iets lekkers erbij. Echt Tea For One dus. En als je liever Tea For Two (of nog meer personen) doet, stuur je gewoon deze kaart om iemand uit te nodigen.
Bliss! Having afternoon tea. You can do it on your own too; truly Tea For One in that case. But if you'd rather have Tea For Two (or more) all you need do is send off this card to invite them over.


Dit zijn de gebruikte materialen:
Here are the materials used:
Tea Time Framelits, Tea Together stempelset. Call Me Cupcake Framelits, Hello Cupcake stempelset en een bloemenstempeltje van Wonderful Romance.
Tea Time Framelits ,Tea Together stamp set. Call Me Cupcake Framelits, Hello Cupcake stamp set and flower stamp from Wonderful Romance.


Basiskaart: een stuk Whisper White van 15,2 x 11,4 cm, met korte zijde boven gerild op 5,7 cm.
De voorkant is een stuk Thick Whisper White van 15,2 x 11,4 cm
Zet met de lange zijde boven vanuit rechts op 1,2 cm een hulplijntje met potlood.
Met de korte zijde boven teken je van links naar rechts een hulplijntje op 5,7 cm.
De basis van de etagère is gestanst uit een restje Lemon Lime Twist papier, het hartje bij de cup cake van een restje Lovely Lipstick Foil Paper.
The base card is a 6" x 4½ piece of Whisper White, with the short side top scored at 2¼".
The card front is a 6" x 4½ piece of Thick Whisper White.
With the long side top, draw a thin pencil line at ½" from the right.
With the short side top, draw a thin pencil line at 2¼" from left to right.
The cake stand base has been die cut from a scrap of Lemon Lime Twist card stock, the heart with the cupcake from a scrap of Lovely Lipstick Foil Paper.


Classic Stampin' Pads

tafelkleed
cupcake
cupcake
cupcake & serviesgoed
serviesgoed
sprinkles
Highland Heather
Grapefruit Grove
So Saffron
Lemon Lime Twist
Pineapple Punch
Lovely Lipstick
tablecloth
cupcake
cupcake
cupcake & china
china
sprinkles
In het filmpje hieronder kun je zien hoe alles in zijn werk gaat. Veel kijkplezier!
The tutorial below shows you how everything is put together. Have fun watching!


filmpje

vrijdag 1 maart 2019

Jongeleren! Juggling!


Hey, hey!
Zijn deze kikkers niet helemaal te gek?
Aren't these frogs too cute?


Dit is het recept om de kaart te maken:
This is the card recipe:
-       basiskaart Highland Heather 21 x 14,85 cm, gerild en gevouwen op 10,5 cm
-       gestempelde mat Highland Heather 8,55 x 13,00 cm
-       perkamentpapier mat 5,70 x 12,40 cm
-       Whisper White mat 5,10 x 11,75 cm
-       Whisper White mat 8,25 x 11,45 cm
-       restjes Whisper White, Highland Heather, Granny Apple Green, Baby Blue
-       base card Highland Heather 8¼" x 5⅞" scored and folded at 4⅛"
-       stamped mat Highland Heather 3⅜" x 5⅛"
-       vellum mat 2¼" x 4⅞"
-       Whisper White mat 2" x 4⅝"
-       Whisper White mat 3¼" x 4½"
-       scraps of Whisper White, Highland Heather, Granny Apple Green, Baby Blue


Inkt - Inks
Gorgeous Grape Classic Stampin' Pad
Memento Tuxedo Black
Stampin' Blends
Granny Apple Green Light & Dark
Mango Melody Dark
Pineapple Punch Light & Dark
Night of Navy Light
Pool Party Light
Balmy Blue Light


Diversen - Miscellaneous
½" circle punch
Stempelsets & snijmallen - Stamp Sets & dies
Labeler Alphabet
So Hoppy Together
Hello Cupcake
Hop Around Framelits