Hey hey!
This year I thought would make a swap for On Stage. I
chose an explosion purse. It has been around for a while, so I don't know who
to give credit. Here's how I made mine.
There's a very clear video on making one on Julie
Dimatteo's YouTube channel. Her channel is called The Paper Pixie. Her purse
has smaller dimensions, you might want to check it out. I have not yet
progressed to making videos. Blogging is enough for now, she said.
You need:
a piece of Designer Series Paper of 7½"
x 7½"
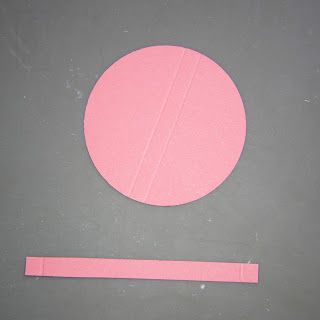
for the top of the bag a Cardstock circle measuring 2½"
for the handle a strip of Cardstock measuring 3½"
x ¼"
small magnets to help keep the purse closed (or Velcro
dots)
Fast Fuse to adhere the top of the purse (or Tombow
Multipurpose Liquid Glue or Tear&Tape)
Glue Dots to adhere the handle and magnets
By the time I got down to writing this blog post I had
run out of the blue Designer Series Paper, so here you see different colours.
Score the 7½" x 7½"
piece at 2½" and 5", turn the paper and score again at
2½" and 5". Along two (opposite!) sides, make
a small indentation at the 3¾" mark. Then make score lines
from the two 3¾" to the corners. Also make diagonal score lines
from the centre towards the corners. Please see the picture of the template.
Mind the following: the 3¾"
marks will be the sides of the purse that will fold in, so if you are using
patterned paper and the pattern is important, have a look at what will be the
part that folds up under the top of the purse. Do I make sense? I hope so. I
learnt the hard way. Look at the picture for the direction of the paper and the
position of the halfway score marks.
 |
| Put down the paper like this. |
Fold and burnish all score lines and cut off the
corners.
Take the 2½" circle and score it at 1⅛"
and 1⅜". Fold and burnish. Take the handle and score it
at 3¼", turn it and score again at 3¼".
Adhere the top to the purse. I fold in the sides of
the purse, this helps me align it.
Adhere the handle to the top. Then adhere a magnet to the inside of the purse, not
too far away from the edge.
 |
| Inside |
Allow the other magnet to adhere itself to the first
magnet on the outside of the purse.
In that way you are sure it's in the right position. Stick a Glue Dot on the
magnet on the outside.
 |
| Outside |
Fold the purse together like this
 |
| (In this picture, the magnet is already adhered to the top.) |
Fold the top of the bag over and adhere it to the Glue
Dot. Gently press down, then open the purse. Press the magnets well onto the
paper.
Finally, stick an embellishment of some kind on the
top of the bag to simulate a closure. The Metal Rimmed Pearls look beautiful
for this.


